
Professional painters have a saying: the paint is the easy part. After more than a decade painting homes throughout the Charlotte area, we can tell you that roughly 70% of what makes an exterior paint job last comes down to what happens before the first coat ever goes on.
Skip or rush the prep, and even premium paint will start peeling, blistering, or fading within a year or two. Here’s the full process, step by step, the same way our crews approach it on every exterior job.
Step 1: Clear the Work Area and Protect What You’re Not Painting
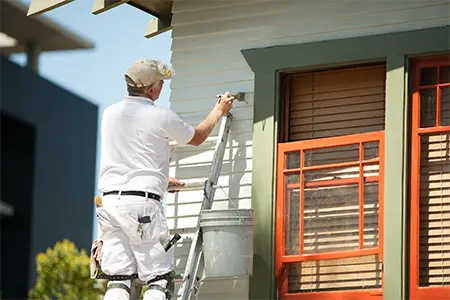
Painting the Exterior of a Charlotte home.
Before anything else touches the house, clear the perimeter. Move outdoor furniture, grills, planters, and trash cans away from the walls. Trim back shrubs, vines, and tree branches so they’re at least a foot from the siding — this also helps the paint job last longer afterward, since trapped moisture from overgrown landscaping is one of the top causes of early paint failure. Cover light fixtures, house numbers, and outlets with painter’s tape and plastic sheeting, and lay drop cloths over walkways, patios, and landscaping beds below the work area.
Step 2: Wash the Entire Exterior
Dirt, pollen, chalky residue, and mildew all sit between your siding and new paint if you skip washing — and paint can’t bond properly to a dirty surface. Most homes get a thorough pressure wash with a cleaning solution; stubborn mildew spots typically need a diluted bleach-and-water treatment. Whichever method you use, let the surface dry completely — usually 24 to 48 hours depending on humidity — before moving to the next step. Painting over a damp surface is one of the fastest ways to trap moisture under a fresh coat and cause blistering.
Step 3: Scrape Away Loose or Failing Paint
Any paint that’s peeling, cracking, or flaking has to come off, or the new coat will fail right along with it. A carbide scraper handles most of this work, and a heat gun can soften stubborn old paint in tricky spots without damaging the wood underneath.
If your home was built before 1978, there’s a real chance older layers contain lead-based paint. Scraping or sanding it without proper containment and safety gear isn’t just risky — it can also violate EPA Renovation, Repair and Painting (RRP) rules. When in doubt, have a professional test it before you start.
Step 4: Sand for a Smooth, Paint-Ready Surface
Sanding does two things: it smooths out any rough edges left from scraping, and it creates a slightly textured surface (sometimes called “tooth”) that new paint can grip. Start with 80-grit sandpaper on rough or heavily scraped areas, then follow up with 100–120 grit to feather the edges between old paint and bare wood so the transition doesn’t show once it’s painted.
Step 5: Repair Damaged Wood and Siding
Paint can’t fix structural problems — it can only hide them temporarily. Soft, spongy wood trim or siding needs to be addressed before painting, either with an exterior-grade wood epoxy filler for minor rot or full board replacement for anything more serious. This is also the point to re-secure any loose siding panels or shutters. For homes with a lot of trim, shutter, or door damage, our trim and shutter painting service often gets folded into the same visit.
Step 6: Caulk Gaps Around Trim, Windows, and Doors
Gaps around windows, door frames, and trim boards let water sneak behind your siding, which is one of the most common causes of paint failure and wood rot down the line. A quality, paintable exterior caulk seals those gaps and gives the new paint a clean, finished edge to work with.
Step 7: Spot-Prime Bare Wood and Problem Areas
Any bare wood, patched repair, or stained area needs primer before topcoat paint goes on — skipping this step is one of the most common reasons paint fails to bond evenly. Use a stain-blocking primer over water stains, knots, and tannin-heavy woods like cedar, and a rust-inhibiting primer on any exposed metal fasteners or fixtures.
Exterior paint generally needs surface temperatures between 50°F and 85°F and low humidity to cure properly — too cold and it won’t form a proper film, too hot and it can blister or dry before it levels out. We’ve written a full breakdown of when not to paint outside if you want to dig into the specifics for our climate.
Why Prep Matters More Than the Paint Itself
It’s tempting to think of prep as the boring part standing between you and a finished project, but it’s genuinely the difference between a paint job that holds up for 10-plus years and one that starts failing in the first year or two. A rushed weekend of prep followed by a great coat of paint will still fail faster than thorough prep followed by a mid-grade paint. If a full exterior prep-and-paint project feels like more than a weekend can handle — and for most homes, it is — that’s exactly the kind of job our crews handle start to finish.
Frequently Asked Questions
Do you need to prime before exterior painting?
You need to prime any bare wood, patched repairs, stains, or exposed metal — you generally don’t need to prime sound, previously painted surfaces that are just getting a fresh coat in a similar color.
How long should you wait to paint after washing the exterior?
Most homes need 24 to 48 hours to dry fully after washing, depending on humidity, temperature, and how much direct sun the surface gets. Painting over a damp surface can trap moisture and cause blistering.
Can you paint over old, failing paint?
No — any peeling, cracking, or flaking paint needs to be scraped away first. Painting over failing paint just means the new coat fails along with the old layer underneath it.
What temperature is too cold or too hot to paint a house exterior?
Most exterior paints need surface temperatures roughly between 50°F and 85°F to cure properly. Below that range paint struggles to form a proper film, and above it, paint can blister or dry too fast to level out smoothly.
How long does exterior painting prep take?
For most homes, prep takes anywhere from one to three days depending on the home’s size and condition, with additional time if there’s significant wood repair or lead paint remediation needed.
Skip the Ladder — Let Us Handle the Prep and the Paint
From washing and scraping to priming and the final coat, our crews handle the entire exterior painting process so you don’t have to. Serving Gastonia, Belmont, Shelby, Charlotte, and surrounding NC communities.
Schedule a Free Estimate
Or call us at (704) 870-7600 — available 7 days a week, 7am–7pm